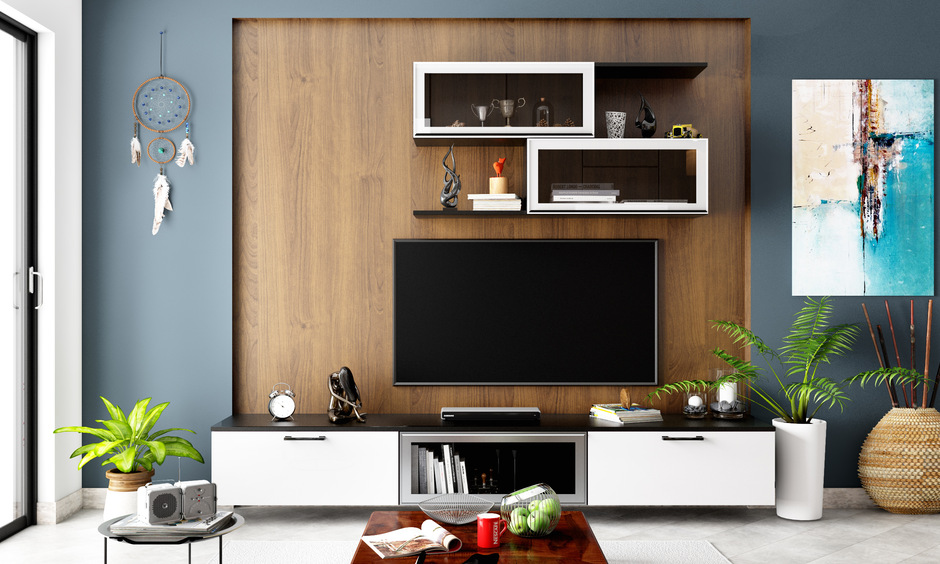
In today’s digital age, media walls have become a popular addition to homes, offices, and event spaces. These versatile installations offer a stunning visual focal point for displaying photos, artwork, videos, and more. While a professionally installed media wall can come with a hefty price tag, it’s entirely possible to create your own impressive media wall quickly and easily, even if you’re not a seasoned DIY enthusiast. In this comprehensive guide, we’ll walk you through the steps to build your very own media wall that will leave your friends, family, and guests in awe.
Planning Your Media Wall Design
Before you start gathering materials and tools, it’s essential to have a clear vision of what you want your media wall to look like. Consider the following factors:
Purpose: Determine what you’ll primarily use the media wall for. Will it display family photos, showcase artwork, or serve as a backdrop for events?
Location: Choose a suitable location for your media wall, considering factors such as wall space, lighting, and visibility.
Size and Layout: Measure the available space and decide on the dimensions of your media wall. Consider whether you want it to cover the entire wall or occupy a specific area.
Materials: Select materials that complement your existing décor and fit within your budget. Common options include wood, metal, and acrylic.
Gathering Materials and Tools
Once you have a solid plan in place, it’s time to gather the necessary materials and tools. Here’s a basic list to get you started:
Wood or Metal Frame: Depending on your design preference, you’ll need materials to construct the frame of your media wall. Opt for sturdy, lightweight materials that are easy to work with.
Mounting Hardware: Choose appropriate mounting hardware based on the weight and size of your media wall. This may include screws, anchors, brackets, and wall mounts.
Display Panels: Select the type of display panels you’ll use to showcase your media. Options include LED screens, LCD monitors, projectors, or traditional picture frames.
Media Player: If you plan to display digital content, you’ll need a media player to connect to your display panels. This could be a dedicated media player device or a computer with suitable software.
Power Strips and Cables: Ensure you have enough power strips and cables to connect all your devices and keep them powered.
Tools: Gather essential tools such as a drill, screws, screwdriver, level, measuring tape, and stud finder.
Building the Frame
With your materials and tools assembled, it’s time to start building the frame for your media wall. Follow these steps:
Measure and Mark: Use a measuring tape and level to mark the dimensions of your media wall on the wall where it will be installed.
Cut and Assemble: Cut the wood or metal pieces to the appropriate lengths and assemble them according to your design. Use screws or brackets to secure the frame together.
Mounting: Once the frame is assembled, use appropriate mounting hardware to secure it to the wall. Be sure to locate and secure it to studs for maximum stability.
Installing Display Panels
Once the frame is securely in place, it’s time to install the display panels. Follow these steps:
Positioning: Determine the layout and positioning of your display panels within the frame. Consider factors such as spacing, alignment, and symmetry.
Mounting: Use mounting brackets or clips to secure the display panels to the frame. Make sure they are securely attached and level.
Wiring: Connect the power cables and any necessary audio/video cables to each display panel. Use cable management solutions to keep cables organized and hidden from view.
Adding Finishing Touches
With the frame and display panels in place, it’s time to add the finishing touches to your media wall:
Decoration: Consider adding decorative elements such as trim molding, paint, or wallpaper to enhance the appearance of your media wall and integrate it seamlessly with your existing décor.
Content Upload: If you’re using digital display panels, upload your desired content using the media player or computer connected to the panels. This could include photos, videos, slideshows, or digital artwork.
Testing: Before showcasing your media wall to others, thoroughly test all components to ensure they are functioning correctly. Check for any wiring or technical issues that may need to be addressed.
Maintenance and Upkeep
Once your media wall is up and running, it’s important to maintain it regularly to ensure optimal performance and longevity:
Cleaning: Regularly dust and clean the display panels and frame to keep them looking their best. Use gentle cleaning solutions and microfiber cloths to avoid scratching or damaging the surfaces.
Software Updates: If you’re using digital display panels, stay up to date with software updates and security patches to prevent compatibility issues and vulnerabilities.
Component Check: Periodically check all components, including cables, connections, and mounting hardware, to ensure they are secure and functioning properly. Replace any worn or damaged parts as needed.
Conclusion
Building your own media wall may seem like a daunting task, but with proper planning, preparation, and execution, it’s entirely achievable for anyone, regardless of DIY experience. By following the steps outlined in this guide and exercising patience and attention to detail, you can create a stunning media wall that will impress and inspire for years to come. So roll up your sleeves, unleash your creativity, and get ready to enjoy the incredible results of your hard work and dedication!


